By Brennan Heyde | July 13, 2011

See why top ecommerce brands use Miva’s no-code platform to run
multiple stores, manage massive catalogs, and grow their revenue.
In this section, you’ll find tips and updates designed to help you get the most from Miva's PR8, directly from our own in-house experts. Our first post in this new section comes to us from Brennan Heyde, Director of Web Design Services at Miva Merchant.
There are many great new features in PR8. Today, I’ll focus on one of them in particular-the ability to add multiple images to your products quickly and easily.
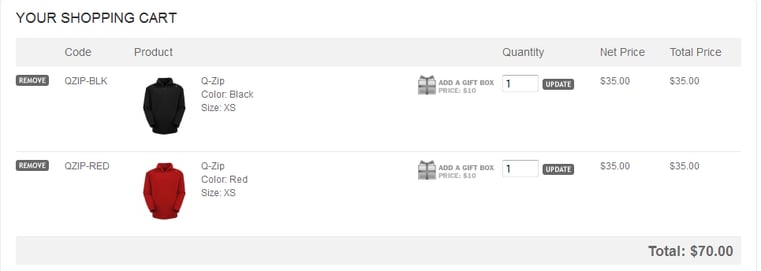
You can do a lot with this functionality, including making the color of an image change when a color attribute is selected. This allows you to show different color images for each color you offer. However, in most cases, you will want to take this one step further and also show the correct color of the product selected on the basket page. This is a great way to instill customer confidence by allowing them to see that they have added the correct products to their basket, and it is a nice design element as well.
Here is an example of the same product in the same cart in two different colors. The correct image is shown, which not only looks nice, but it also visually lets the customer know which color they selected.

Here are the steps to achieving this functionality in Miva Merchant PR8.
First, you need to turn on the Custom Image Fields under Utilities. Adding the image to the basket page requires image types to be set up, and it order to be able to assign image types to pages like the basket page, this setting must be turned on. On the left menu click the plus sign (+) next to Utilities and check the box next to Product Image Custom Fields to activate it.

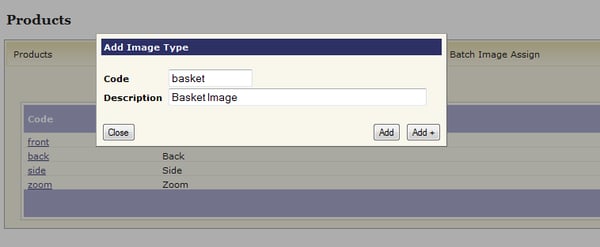
Next you need to create an image type for the basket page. This can be done on any product page or on the main Products screen.

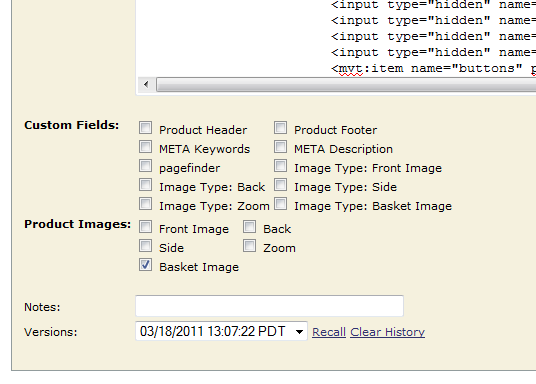
Go to the BASK page and then click on the “basket contents” tab. Assign the image type you want to display here to this page by checking the box next to the image type. This is similar to how regular custom fields work on CTGY or PROD.

Any image type assigned to a page automatically becomes available on the page via SMT. You can reference it by using this entity: &mvte:item:imagetypes:basket; where “basket” would be is where the code for the image type you created in step 2 should display.
< mvt:if expr=“l.settings:item:imagetypes:basket”>
<img src=”&mvte:item:imagetypes:basket;” alt=”&mvt:item:name;” title=”&mvt:item:name”>
</mvt:if>
The last thing that you will need to do is to assign the correct image to the different product variants. If you just want the main image to show up, you can simply assign the basket image to the master product. However, if you want the color that the customer selects to display instead, you will need to generate variants for the product, and then go to the individual product variants and assign the correct color image, making sure to give it an image type of “basket.”
Back to topNo worries, download the PDF version now and enjoy your reading later...
Download PDF Brennan Heyde
Brennan Heyde is the VP of Payments & Strategic Partners at Miva. His goal is to help Miva customers increase revenue through payments and solve important customer problems via integrations Miva supports.
Visit Website